Oh hey blog, it’s been a long while! Glad you’re still here!
I’m so thrilled that Alina from Alina Design Co. asked me to be a part of this blog tour because it really gave me the push to sew up this jacket. I’d been meaning to work on this for a while but having a deadline got me working on it! I definitely should have said no when she asked given all the sewing, school, and work commitments going on this month but I managed to get through this jacket and it’s already become a go-to wardrobe piece.

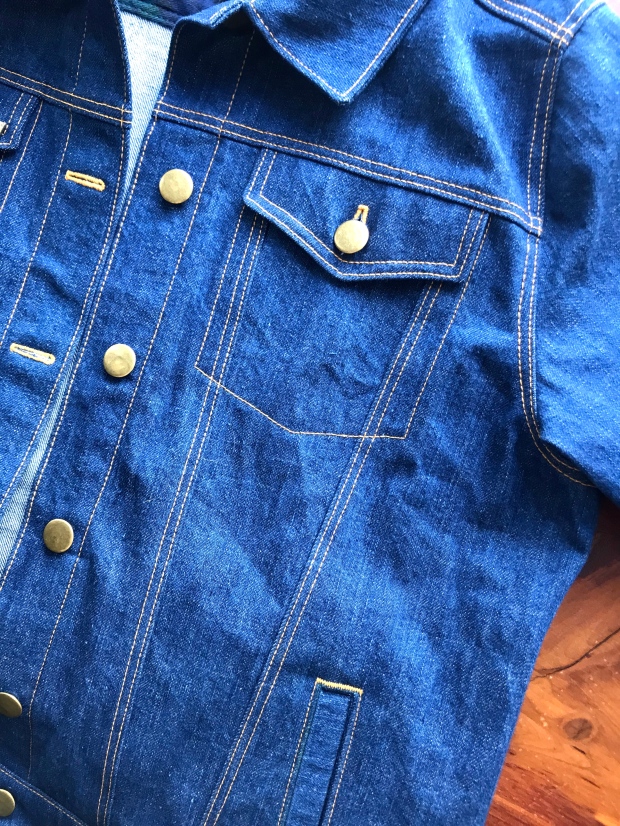
I purchased the Hampton Jean Jacket pattern as soon as it came out and then jumped on the fabric and hardware kits that Threadbare Fabric was offering to go with the pattern. The denim in the kits was a non-stretch mid-weight in a fairly dark indigo. I knew that I wanted a pretty classic jean jacket–I didn’t currently have one in my closet and felt like starting with a classic one would be most useful. But I also knew that I wanted to get a bit of a jump start on aging and wearing in my jacket.

I followed Alina’s directions for bleaching denim and made a day of it bleaching both the denim for this jacket and some natural denim that I wanted white for some Morgan Jeans. Bleaching went well and I was able to achieve the color I was going for based on my test swatches.

I did decide against further distressing partly because I didn’t want to rush the process of distressing and ruin my jacket and also because I’ve never distressed denim and it makes me anxious to think of taking sandpaper to a handmade garment! (That said, I think some of the distressed Hamptons that I’ve seen are absolutely perfect and if I make another one I might give it a try.)

I’m hoping to throw my Hampton in the wash regularly until it starts to wear in a bit. As I’ve washed and worn my handmade jeans I do really love the way that they break in and I hope this jacket can achieve a similar look.


I made no fit adjustments to my Hampton, choosing to make a straight size 12. I was daring (read: irresponsible) and did not make a muslin for this jacket. This was mostly a matter of feeling crunched for time, but I’ve found that I’m generally safe going with my measurements in indie patterns, especially when they are a looser fit. The size I choose feels roomy enough for layering underneath but not too big that I can’t wear it with just a t-shirt underneath. (Obviously I would recommend to anyone not confident about their sizing to make a muslin because it’s a real bummer when finished garments don’t fit!)

I sewed up my jacket following Alina’s fantastic instructions, deviating only slightly to sew as much with regular thread before switching to topstitching thread. I’ve discovered while sewing numerous pairs of jeans that changing up the construction order to do as many steps as possible with each thread before switching really helps the process go faster.

The only design change I made was to line the back yoke. I didn’t really want the stitching to show on the back from adding my label so a lined yoke was an easy way to hide that. I sandwiched the back bottom panels between the inner and outer yokes and pressed both up and topstitched through all three.

I did not use flat-felled seams for my jacket, again partly because of the time crunch but also because I like the look of serged and topstitched seams on the inside.

Overall, this jacket came together so much faster than I was expecting. I had no problem with things coming together; the pattern is drafted perfectly. It probably took me about 20 hours over the course of five days which was a lot less time than I had anticipated. It’s a very approachable pattern, even though there’s a lot of pieces and a lot of seaming it goes together quite quickly!

My jacket is pictured here with a few different outfits–one thing that I’ve loved about this jacket so far is that it seems to go with everything! Also, I had a lot of fun deciding which enamel pins to add to my jacket. These two, from Colette Patterns and Quilt Kween were top choices for now but I think I’ll probably switch them out once in a while.

If you are looking for a great layering piece to add to your wardrobe I highly recommend the Hampton Jean Jacket! Alina is offering a discount to readers this week so go pick up the pattern and use “HAMPTONSFORALL” to get 15% off!

There are six other fabulous ladies sewing up and sharing their Hampton Jean Jackets this week! Go check out their fantastic versions!


This denim jacket is perfect. And love the pins!
https://www.bluelabelsboutique.com
http://www.fashionnotfear.com
LikeLike